
Delicious Peanut Butter Cookies No Brown Sugar
Welcome to my kitchen! Today, I’m sharing my peanut butter cookies no brown sugar recipe, a dessert that’s always a hit at family gatherings and afternoon coffee breaks. I first tried making cookies without brown sugar when I realized I’d run out during a last-minute baking session for my daughter’s school event. What started as a pantry emergency turned into a delightful discovery – these peanut butter cookies came out incredibly soft, with a pure peanut butter flavor that wasn’t masked by molasses or caramel notes. The texture was perfect, the taste was divine, and I’ve been making them this way ever since.
This recipe is perfect for anyone who loves classic peanut butter cookies and wants something easy, delicious, and fun to bake. Whether you’re a beginner baker or a seasoned pro, you’ll appreciate how straightforward this recipe is. The ingredients are simple, the method is foolproof, and the results are consistently amazing. What I love most about these cookies without brown sugar is their clean, straightforward sweetness that lets the creamy peanut butter shine through. Plus, you probably have everything you need in your pantry right now! Let’s dive in and see why this peanut butter cookies no brown sugar recipe is a must-try!
Table of Contents
Quick Recipe Facts
Prep Time: 15 minutes
Cook Time: 10-12 minutes
Total Time: 27 minutes
Servings: 24 cookies
Difficulty: Easy
Calories: ~140 per cookie
This recipe is surprisingly quick and easy – perfect for busy afternoons when you need a sweet treat in under 30 minutes!
Ingredients
For this peanut butter cookies no brown sugar recipe, you’ll need the following ingredients. The beauty of this recipe is its simplicity – just a handful of pantry staples create magic. You can swap regular butter with coconut oil for a dairy-free version, or use natural peanut butter if you prefer a more wholesome approach. White granulated sugar provides the perfect sweetness without overpowering the peanut butter flavor.
Main Cookie Ingredients:
- 1 cup (240g) creamy peanut butter (smooth, not natural with oil separation)
- ½ cup (115g) unsalted butter, softened to room temperature
- 1 cup (200g) granulated white sugar
- 1 large egg, room temperature
- 1 teaspoon pure vanilla extract
- 1¼ cups (155g) all-purpose flour
- ¾ teaspoon baking soda
- ½ teaspoon baking powder
- ¼ teaspoon salt
- Additional granulated sugar for rolling (about ¼ cup)
Ingredient Notes:
- Peanut butter: I recommend using commercial creamy peanut butter like Skippy or Jif. Natural peanut butter can make the cookies too oily.
- Butter: Must be softened but not melted. Leave it on the counter for about 30 minutes before starting.
- Sugar alternatives: You can use half granulated sugar and half coconut sugar if you want a subtle depth of flavor, but stick with mostly white sugar for that classic texture.
- Egg: Room temperature eggs incorporate better into the dough, creating a more uniform texture.
Instructions
Step 1: Preheat your oven to 350°F (175°C) and line two baking sheets with parchment paper. This temperature helps your peanut butter cookies bake evenly, creating that perfect slightly crispy edge with a soft center.
Step 2: In a large mixing bowl, cream together the softened butter, peanut butter, and granulated sugar using an electric mixer on medium speed for about 2-3 minutes. The mixture should become light and fluffy. This step is crucial for creating tender cookies without brown sugar – the air incorporated during creaming helps with texture.
Step 3: Add the egg and vanilla extract to the butter mixture. Beat on medium speed for another minute until everything is well combined and smooth. Scrape down the sides of the bowl with a rubber spatula to ensure even mixing.
Step 4: In a separate medium bowl, whisk together the flour, baking soda, baking powder, and salt. This dry ingredient blend is what gives structure to your peanut butter cookies.
Step 5: Gradually add the dry ingredients to the wet mixture. Mix on low speed or fold in with a wooden spoon just until combined. Don’t overbeat at this stage – overmixing can lead to tough cookies. The dough should be thick and slightly crumbly but hold together when pressed.
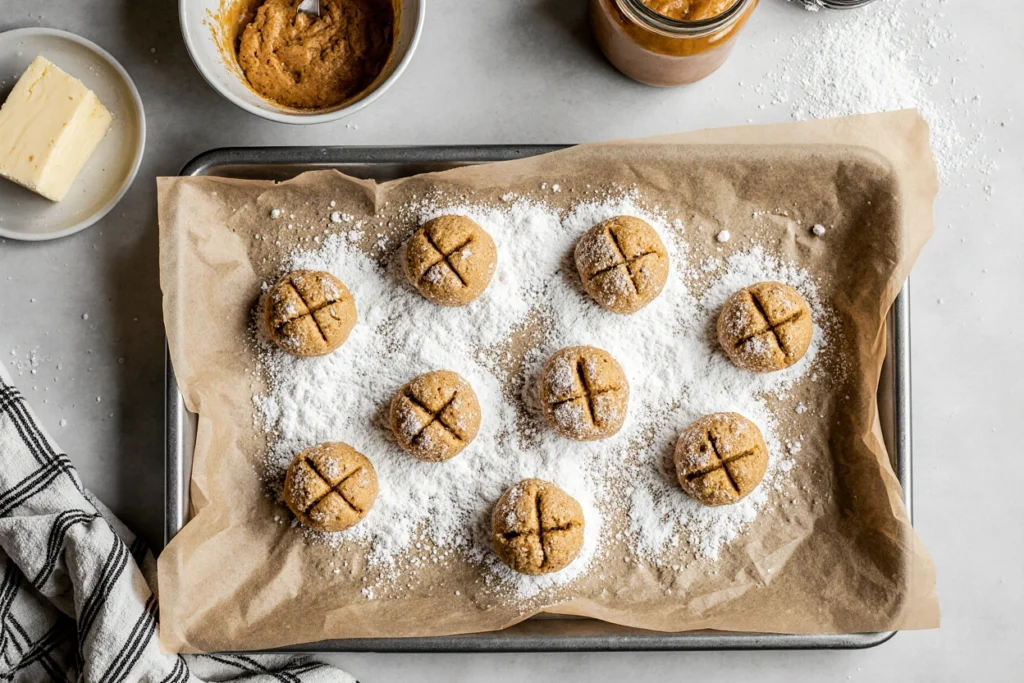
Step 6: Pour the additional ¼ cup of granulated sugar into a small bowl. Scoop about 1½ tablespoons of dough and roll it into a ball between your palms. Roll the ball in the sugar to coat completely, then place it on your prepared baking sheet.
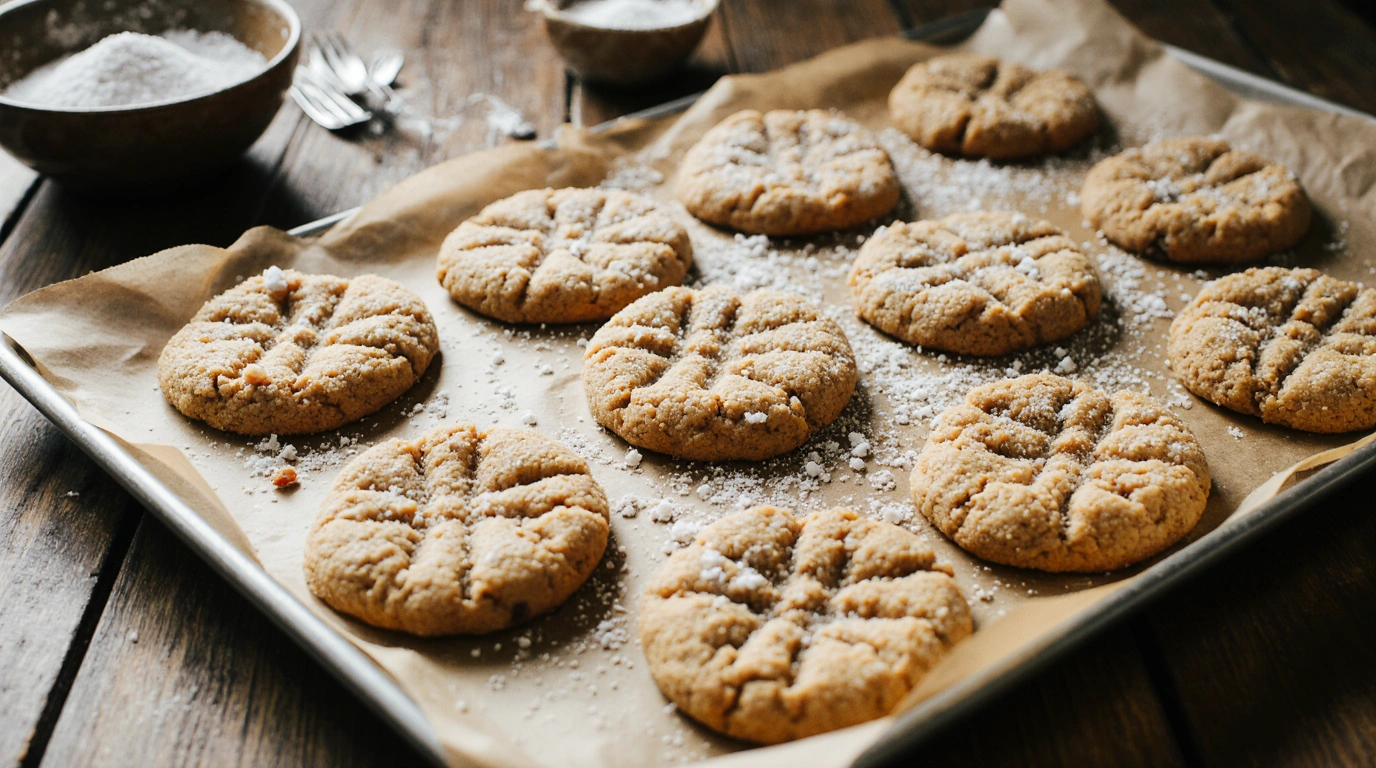
Step 7: Using a fork, press a crisscross pattern into the top of each cookie, flattening it to about ½-inch thickness. This classic peanut butter cookie design isn’t just decorative – it helps the cookies bake evenly. Dip your fork in sugar between presses to prevent sticking.
Step 8: Space the cookies about 2 inches apart on the baking sheet. They’ll spread slightly during baking but maintain their shape beautifully.
Step 9: Bake for 10-12 minutes, until the edges are just set and lightly golden. The centers might look slightly underdone, but they’ll firm up as they cool. For softer cookies, bake for 10 minutes; for crispier edges, go for 12 minutes.
Step 10: Remove from the oven and let the cookies cool on the baking sheet for 5 minutes before transferring them to a wire rack. This resting time is essential – it allows the cookies to set properly without breaking.
Pro Tips
Tip 1: Don’t skip the fork-pressing step – it’s not just for looks! The crisscross pattern helps these cookies without brown sugar bake evenly by creating a uniform thickness. Plus, it’s a fun activity if you’re baking with kids.
Tip 2: Use room temperature ingredients, especially the butter and egg. Cold ingredients don’t blend as smoothly, which can affect the texture of your peanut butter cookies. I like to set my butter out about 30 minutes before I start baking.
Tip 3: If you prefer chewier cookies, slightly underbake them by removing them from the oven when the centers still look a tiny bit soft. They’ll continue cooking on the hot pan as they cool, resulting in that perfect chewy texture.
Tip 4: For extra peanut butter flavor, fold in ½ cup of peanut butter chips after mixing in the dry ingredients. This addition creates delightful pockets of melted peanut butter throughout your cookies.
Tip 5: Make sure your baking soda and baking powder are fresh. Old leavening agents won’t give your peanut butter cookies the lift they need. Test them by adding a pinch to vinegar or hot water – they should bubble vigorously.
Tip 6: If your dough feels too crumbly and won’t hold together, add 1-2 teaspoons of milk to help bind it. The consistency should be similar to play dough – moldable but not sticky.
Serving Suggestions
These peanut butter cookies no brown sugar are delicious served in so many ways! Enjoy them warm from the oven with a cold glass of milk – there’s nothing quite like that combination. They also pair beautifully with afternoon tea or coffee, making them perfect for casual get-togethers or afternoon breaks.
For a special dessert, create cookie sandwiches by spreading a thin layer of raspberry jam or chocolate hazelnut spread between two cookies. You can also serve them alongside vanilla ice cream for an elevated treat. During the holidays, I love packaging these cookies in decorative tins with colorful ribbons – they make wonderful homemade gifts.
For kids’ parties, set up a cookie decorating station with melted chocolate for drizzling and colorful sprinkles. This serving idea elevates your peanut butter cookies experience and turns a simple treat into an interactive activity.
Storage & Reheating
Store your peanut butter cookies in an airtight container at room temperature for up to 5 days. They stay wonderfully soft when stored properly – just make sure the container seals well to prevent them from drying out. I like using a cookie jar or a plastic container with a tight-fitting lid.
If you want to enjoy them warm, pop a cookie in the microwave for about 8-10 seconds. This brings back that fresh-from-the-oven texture and makes the cookies taste like you just baked them. Avoid storing them in the refrigerator, as this can dry them out and make them lose their soft, chewy texture.
For longer storage, these cookies freeze beautifully! Place them in a freezer-safe container or bag with parchment paper between layers to prevent sticking. They’ll keep for up to 3 months in the freezer. Thaw at room temperature for about 20 minutes, or warm them briefly in the oven at 300°F for 5 minutes to restore their texture.
Pro storage tip: You can also freeze the unbaked cookie dough balls. Roll them in sugar, place them on a baking sheet to freeze solid, then transfer to a freezer bag. Bake straight from frozen, adding 1-2 minutes to the baking time. This way, you can have fresh peanut butter cookies whenever a craving hits!
Health & Nutrition Info
Each peanut butter cookie contains approximately 140 calories, making them a reasonable treat when enjoyed in moderation. The peanut butter provides about 3 grams of protein per cookie, along with healthy fats that help keep you satisfied.
For dietary modifications, this recipe is quite adaptable. You can make it gluten-free by substituting the all-purpose flour with a 1-to-1 gluten-free baking flour blend. For a dairy-free version, replace the butter with coconut oil or vegan butter – the texture remains excellent. If you’re watching your sugar intake, you can reduce the granulated sugar to ¾ cup, though the cookies will be slightly less sweet and might spread a bit less.
Consider using natural peanut butter with no added sugar if you want to cut down on processed ingredients, though you may need to adjust the consistency by adding an extra tablespoon or two of flour. This healthier peanut butter cookies option is perfect for weekend treats or when you want to indulge without feeling too guilty. The combination of protein and fats from the peanut butter makes these more satisfying than many other cookie recipes.
Conclusion
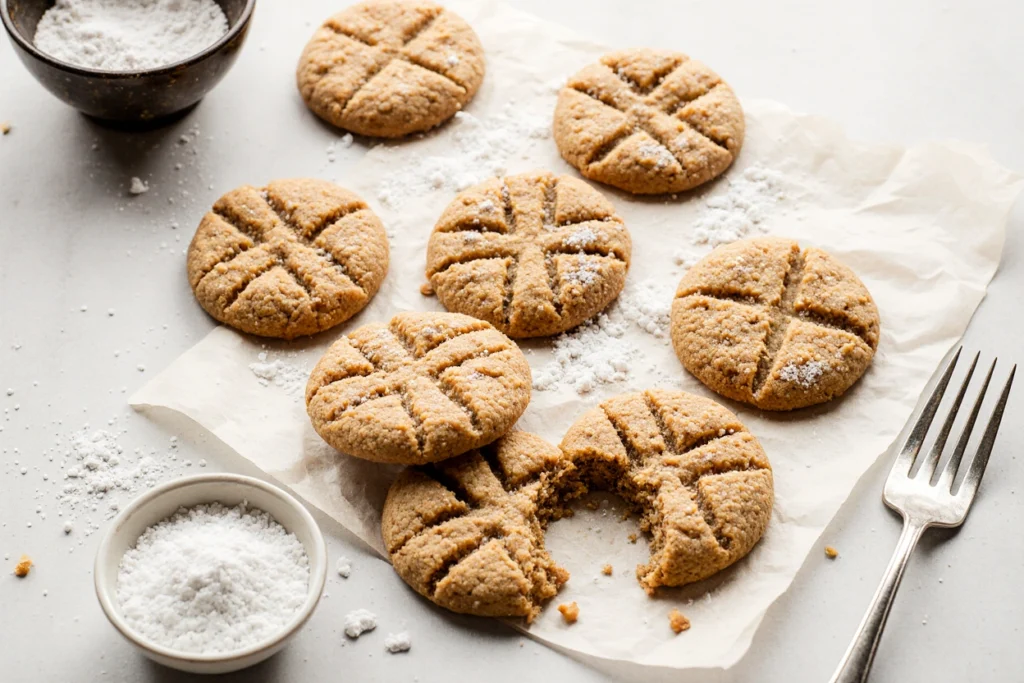
There you have it – my foolproof peanut butter cookies no brown sugar recipe that delivers perfect results every single time! These cookies prove that you don’t need brown sugar to create incredibly delicious, soft, and flavorful treats. The pure sweetness of granulated sugar lets the rich peanut butter taste shine through, while the simple ingredient list means you can whip up a batch whenever the mood strikes.
What I love most about this recipe is how versatile it is. Whether you’re baking for a crowd, need a quick dessert, or want to get the kids involved in the kitchen, these cookies are always a winner. The classic crisscross pattern brings back nostalgic memories, and the texture is absolutely spot-on – slightly crispy edges with tender, chewy centers.
Try this peanut butter cookies no brown sugar recipe and let me know how it turned out! I’d love to hear about your baking adventures. Did you add any fun variations? What did your family think? Drop a comment below, rate the recipe, and share your photos on social media – tag me so I can see your beautiful creations!
If you loved these cookies, be sure to check out my other easy cookie recipes: Classic Chocolate Chip Cookies, Snickerdoodles Without Cream of Tartar, and Soft Sugar Cookies. Happy baking, friends!
FAQ
Can I freeze this recipe?
Absolutely! Yes, your peanut butter cookies no brown sugar can be frozen for up to 3 months. Store baked cookies in an airtight freezer container with parchment paper between layers. You can also freeze the unbaked cookie dough balls – just add 1-2 minutes to the baking time when baking from frozen.
What if I don’t have peanut butter?
While peanut butter is the star of this recipe, you can substitute it with other nut or seed butters. Almond butter, cashew butter, or sunflower seed butter work well, though each will give a slightly different flavor. Keep the measurements the same.
Can I make these cookies ahead of time?
Definitely! You can prepare the dough up to 2 days in advance and store it covered in the refrigerator. Let it sit at room temperature for 10-15 minutes before rolling and baking. Alternatively, bake the cookies 1-2 days ahead and store them in an airtight container – they stay fresh and delicious.
How can I adjust the sweetness?
If you find the cookies too sweet, reduce the granulated sugar to ¾ cup. For sweeter cookies, you could increase it to 1⅛ cups, though I find the recipe as written hits the perfect balance. Remember that the peanut butter also adds some sweetness, so adjust based on your brand’s sugar content.
Why did my cookies spread too much?
Excessive spreading usually happens if the butter was too warm or melted, or if the dough wasn’t chilled. Make sure your butter is softened but still holds its shape. If your kitchen is very warm, chill the dough for 30 minutes before baking. Also check that your baking soda is fresh and your oven temperature is accurate.
Can I use natural peanut butter?
Natural peanut butter can work, but it may make the cookies more oily and cause them to spread more. If using natural peanut butter, stir it very well first, and consider adding an extra 2-3 tablespoons of flour to compensate for the higher oil content. Commercial peanut butter gives more consistent results.
How do I know when the cookies are done?
Look for lightly golden edges while the centers still appear slightly soft. The cookies will continue to cook on the hot pan after removing from the oven. If you wait until the centers look completely done, you’ll end up with overcooked, dry cookies. Trust the timing and the visual cues!
Can I make these cookies smaller or larger?
Yes! For mini cookies, use about 1 tablespoon of dough per cookie and reduce baking time to 8-9 minutes. For larger cookies, use 2-3 tablespoons of dough and increase baking time to 13-15 minutes. Just adjust the spacing on your baking sheet accordingly.
Have You Tried Our Recipe?
There are no reviews yet. Be the first one to write one.